
雙線性插值(Bilinear interpolation)的圖像旋轉在mobile上面的C++實現
我們找來了圖像旋轉的公式:
X' = X cosθ - Y sinθ;
Y' = X sinθ + Y cosθ;
這個圖像公式大家在高中數學課都是會算滴。 然後我們要擴展一下因為我們不是在原點做旋轉,我們要圍繞原來的圖片中心做旋轉, 那麼我們假定原來的圖像中心是 oldCenterX, oldCenterY.旋轉完成以後, 我們要對圖像位置坐調整,調整到新的坐標中心, 那麼我們需要有個新的newCenterX, newCenterY;新的坐標就是新的圖片的中心。那麼我們的公式就可以轉化成了:
X' = (X-oldCenterX) cosθ - (Y-oldCenterY) sinθ + newCenterX;
Y' = (X-oldCenterX) sinθ + (Y-oldCenterY) cosθ + newCenterY;
當然啦, 關鍵我們的問題不是旋轉後的位置,而是旋轉以後位置對於到原來的位置關系,也就是說我們更需要的是一個X,Y關於X'和Y'的表達式。很簡單的,我們把問題變成了2元一次方程!
X = Y'sinθ + X'cosθ + oldCenterY - newCenterX cosθ - newCenterY sinθ;
Y = Y'cosθ - X'sinθ + oldCenterY - newCenterY cosθ + newCenterX sinθ;
這樣要寫個合適的代碼就變得簡單了。 但是另一個顯著的問題就是沒有三角函數怎麼辦呢? 就像我們插值的時候用大數一樣, 我們用左移13位的大數來描述一下先,就像下面這樣的:
view plaincopy to clipboardprint?
//test interface for math
const int K_CosineTable[24] =
{
8192,
8172,
8112,
8012,
7874,
7697,
7483,
7233,
6947,
6627,
6275,
5892,
5481,
5043,
4580,
4096,
3591,
3068,
2531,
1981,
1422,
856,
285,
-285
};
int ShiftCos(int y)
{
if (y<0) y*=-1;
y %= 360;
if ( y > 270 )
{
return ShiftCos((360 - y));
}
else if ( y > 180 )
{
return - ShiftCos((y - 180));
}
else if ( y > 90 )
{
return - ShiftCos((180 - y));
}
int index = (y >> 2);
int offset = (y % 4);
// on the borderline of overflowing if use JInt16
int cosVal = (4 - offset) * K_CosineTable[index]
+ offset * K_CosineTable[index + 1];
return cosVal >> 2;
}
int ShiftSin(int y)
{
return ShiftCos(y + 270);
}
有了這個三角函數的輔助:我們的最後的代碼就是這個樣子:
view plaincopy to clipboardprint?
/**
** method to remove sharp the raw image with unsharp mask
* @param src input grayscale binary array
* @param srcWidth width of the input grayscale image
* @param srcHeight height of the input grayscale image
* @param [output] dst output gray-scale image.
* @param [output] dstWidth width of the output grayscale image
* @param [output] dstHeight height of the output grayscale image
* @param angle, rotate angle.
*/
void rotateImage (const unsigned char* src, int srcWidth, int srcHeight, unsigned char*& dst, int& dstWidth, int& dstHeight, int angle)
{
// first calculate the new width and height;
const int SHIFT = 13;
dstWidth = ( abs (srcWidth*ShiftCos(angle)) + abs (srcHeight*ShiftSin(angle))) >> SHIFT;
dstHeight = ( abs (srcWidth*ShiftSin(angle)) + abs (srcHeight*ShiftCos(angle))) >> SHIFT;
dst = new unsigned char [dstWidth*dstHeight];
int xcenter = srcWidth >> 1;
int ycenter = srcHeight >> 1;
int xnew = dstWidth >> 1;
int ynew = dstHeight >> 1;
const int xFix = ( xcenter <<8 ) - ((ynew * ShiftSin (angle)) >> 5 ) - ((xnew * ShiftCos (angle)) >> 5) ;
const int yFix = ( ycenter <<8 ) + ((xnew * ShiftSin (angle)) >> 5 ) - ((ynew * ShiftCos (angle)) >> 5) ;
int ox;
int oy;
int x;
int y;
int kx;
int ky;
int color [2][2];
for (int j=0;j
{
for (int i=0;i
{
ox = ((i * ShiftCos (angle) + j * ShiftSin (angle)) >> 5) + xFix;
oy = (((-1) * i * ShiftSin(angle) + j * ShiftCos (angle)) >> 5) + yFix;
if ( (ox >> 8) <= srcWidth && (ox >> 8) >=0 && (oy >> 8) <= srcHeight && (oy >> 8) >= 0)
{
kx = ox >> 8;
ky = oy >> 8;
x = ox & 0xFF;
y = oy & 0xFF;
color[0][0] = src[ ky*srcWidth + kx ];
color[1][0] = src[ ky*srcWidth + kx +1 ];
color[0][1] = src[ (ky+1)*srcWidth + kx ];
color[1][1] = src[ (ky+1)*srcWidth + kx+1 ];
int final = (0x100 - x)*(0x100 - y)*color[0][0] + x*(0x100 - y)*color[1][0] + (0x100-x)*y*color[0][1] + x*y*color[1][1];
final = final >> 16;
if (final>255)
final = 255;
if (final<0)
final = 0;
dst [ j*dstWidth + i] = (unsigned char)final;
}
else
{
dst [j*dstWidth + i] = 0xff;
}
}
}
}
這裡說明一下的是接口的定義,這裡的和目標灰度圖相關的參數都是引用類型的。表示都是輸出的參數,因為圖像旋轉以後的大小會發生變化,函數外不是很方便事先分配好內存,所以這裡采用了就地分配的模式。內存分配在函數內部完成。雖然沒有用ticks去最後測速,但是想來沒有浮點數的計算,這裡的效率還是比較高的,當然這裡一些細節的記錄上還有可以再優化一下的,比如說這個常數5!!!Majic Number呵呵, 其實就是原來的那些數字都希望是左移8的, 所以三角函數中出來的數字需要左移5位!!除此以外就完全是公式的套用了 呵呵。
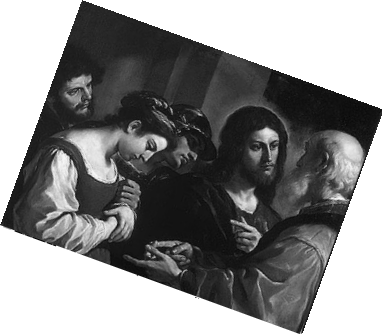
最後來點各個角度的效果圖看看:
20度
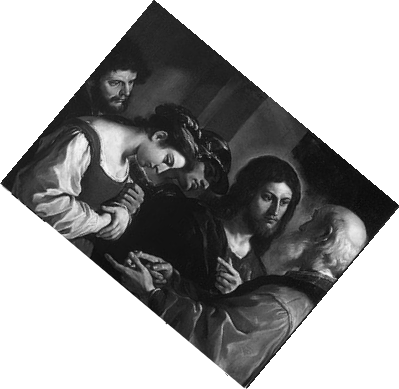
40度
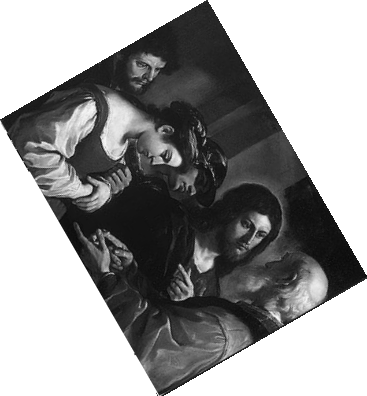
60度
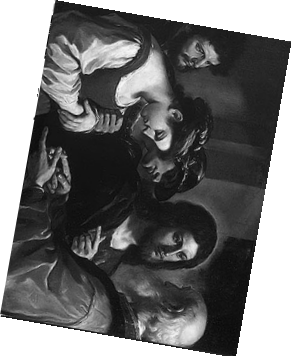
80度

100度
120度

本文來自CSDN博客,轉載請標明出處:http://blog.csdn.net/hhygcy/archive/2009/08/20/4465876.aspx
沒有留言:
張貼留言